Published on May 24, 2025
Ettercap on Kali Linux: Complete Guide
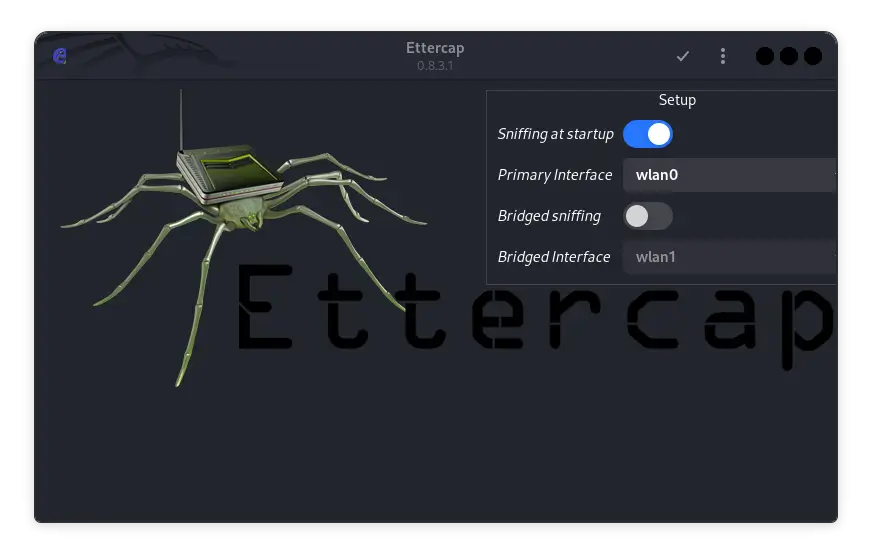
Ettercap is a very popular tool in the cybersecurity community for performing man-in-the-middle (MITM) attacks. Developed to support various types of network attacks, Ettercap allows users to analyze network traffic, inject packets, and manipulate data transferred between hosts. In this article, we will take a deep dive into how to use Ettercap on Kali Linux , a Linux distribution specifically designed for penetration testing and digital forensics.
What is Ettercap?
Ettercap, short for “Ethernet Capture”, is an open-source tool designed to detect, analyze, and perform MITM attacks on local networks. It supports a variety of protocols and provides a variety of features, including:
- Sniffing on live connections.
- Content filtering in data packets.
- Injecting data into active connections.
- ARP poisoning attacks to hijack communications between two hosts.
Ettercap can work on both switched and hubbed networks, and supports a variety of platforms including Linux and Windows . However, Kali Linux is one of the most common platforms to use Ettercap due to the variety of other supporting tools available in this distribution.
Installing Ettercap on Kali Linux
Kali Linux usually comes with Ettercap installed by default. However, if you want to make sure or do a manual installation, you can follow these steps:
- Open a terminal in Kali Linux.
- Run the following command to update the package list:
sudo apt update
- Install Ettercap with the command:
sudo apt install ettercap-common ettercap-graphical
This command will install both the CLI (Command Line Interface) and GUI (Graphical User Interface) versions of Ettercap.
Starting Ettercap
Once the installation is complete, you can run Ettercap in CLI or GUI mode. To open the Ettercap GUI, run the following command in a terminal:
sudo ettercap -G
The Ettercap GUI will open, and you can start using the graphical interface to configure a MITM or sniffing attack.
Running Ettercap in CLI Mode
If you are more comfortable using the terminal, you can run Ettercap in CLI mode with the following command:
sudo ettercap -T -i <interface>
Replace <interface> with the network interface you want to use, such as eth0 or wlan0.
Basic Ettercap Configuration
Before you start performing an attack, it is important to understand how to properly configure Ettercap. Here are some basic steps for configuration:
- Selecting a Network Interface
After running Ettercap, the first step is to select the network interface that will be used for the attack. You can select this interface from the “Sniff > Unified Sniffing” menu in the GUI or using the -i flag in the CLI.
- Scanning Hosts on the Network
The next step is to scan the network for active hosts. You can do this by selecting “Hosts > Scan for hosts” in the GUI or using the following command in the CLI:
sudo ettercap -Tq -i <interface> -P arp:remote // //
Once the scan is complete, you can view the list of hosts by selecting “Hosts > Host List” in the GUI.
- Selecting Targets
After finding active hosts, the next step is to select targets for the MITM attack. You can add hosts to the target list by selecting them from the list of discovered hosts.
- Performing an ARP Poisoning Attack
ARP Poisoning is one of the primary methods used by Ettercap to hijack communications between two hosts. You can initiate this attack by selecting “Mitm > ARP poisoning” in the GUI and checking the “Sniff remote connections” option.
In CLI mode, you can run the following command to start an ARP poisoning attack:
sudo ettercap -T -M arp:remote /<target1>/ /<target2>/
Replace <target1> and <target2> with the IP addresses of the targets you want to attack.
Advanced Ettercap Features
Ettercap is not limited to basic MITM attacks. There are many advanced features that can be used to increase the effectiveness and scope of the attack. Here are some of the advanced features that you can use:
1. Ettercap Plugins
Ettercap comes with various plugins that can be used for various purposes. Some popular plugins include:
dns_spoof: To spoof DNS responses and redirect targets to fake sites.sslstrip: To downgrade HTTPS connections to HTTP so that data can be captured in plaintext.
To enable the plugin, you can select “Plugins > Manage Plugins” in the GUI or use the -P flag in the CLI.
2. Ettercap Filters
Ettercap allows users to create custom filters that can filter and modify the content of data packets. You can write filters in Ettercap’s custom language, and then compile them for use in attacks.
An example of a simple filter to change all instances of “Google” to “DuckDuckGo” in a data packet:
if (search(DATA.data, "Google")) {
replace("Google", "DuckDuckGo");
msg("Replacing Google with DuckDuckGo");
}
Save this filter in a file, compile it with the etterfilter command, and then use it during an attack.
3. SSL Dissection
Ettercap can also be used to compromise SSL/TLS connections. Although this connection is encrypted, Ettercap can be used to perform SSL dissection, allowing users to view the supposedly secure data.
To do this, you need to configure Ettercap with a custom SSL certificate, and then use it to replace the original certificate in the target connection.
Conclusion
Ettercap is a very powerful tool in the penetration testing toolkit, especially in performing MITM attacks. With a flexible interface, both CLI and GUI, and support for a variety of attack types and plugins, Ettercap offers a wealth of features for cybersecurity professionals. Mastering this tool on Kali Linux can provide a significant advantage in identifying and exploiting network vulnerabilities.
However, like all penetration testing tools, Ettercap should be used ethically and legally, with permission from the owner of the network being tested. As a powerful tool, Ettercap has the potential to be used maliciously, but it can also be a valuable asset in protecting a network from security threats.
That’s all the articles from Admin, hopefully useful… Thank you for stopping by…

